Studio Core
Transport, timeline, session view, mixer, export.
The Studio is where everything happens — transport, timeline, session clip launcher, mixer, and exports. Four primary views, switchable with 1 2 3 4.
Transport
The transport bar lives at the top of the studio. Play/stop, record, BPM, time signature, metronome, loop, count-in, and the time display all live here.
| Play / Stop | Space |
| Record arm | R |
| Metronome | M |
| Loop region | L |
| Jump to start | Home |
| Jump to end | End |
| Solo selected track | S |
| Show shortcut sheet | ? |
BPM & time signature
Click the BPM number to type a value, or drag vertically to scrub. Time signature is a dropdown — 4/4 by default, with 3/4, 6/8, 7/8, 5/4 ready to go. Tempo automation lives in the master automation lane (see Timeline).
Count-in & loop
Count-in (1, 2, or 4 bars) primes the metronome before record arms. Loop drags two handles on the timeline ruler to set the loop region — toggle with L.
Timeline arrangement
The Timeline view is your linear arrangement: tracks stacked vertically, time running left-to-right. Drag the playhead in the ruler to scrub. Drag clips to move, hold the edge to trim, double-click to open the clip editor.
Clip operations
| Cut clip | ⌘/Ctrl + X |
| Copy clip | ⌘/Ctrl + C |
| Paste clip | ⌘/Ctrl + V |
| Duplicate clip | ⌘/Ctrl + D |
| Delete clip | Delete |
| Undo / Redo | ⌘/Ctrl + Z / ⇧Z |
Slicing & warping
Right-click an audio clip → Slice at markers to split on transients, or hover the clip and drag the scissor handle for a manual cut. Warp uses the project BPM as the target; toggle Warp in the clip inspector to lock the clip to the grid as you change tempo.
Automation lanes
Click the triangle on a track header to expose its automation lane. Pick a parameter (volume, pan, send, any plugin knob), then click on the lane to add breakpoints. HoldAlt while dragging for fine control.
Session clip launcher
Session view (press 2) is the non-linear jam grid. Each track has a column of clip slots; trigger them in any order. Horizontal rows are scenes — fire a scene and every slot in that row launches together.
Each clip has a follow action — what happens when it ends. Pick none, same, next, previous, or random. Build entire arrangements that loop and morph without ever touching the timeline.
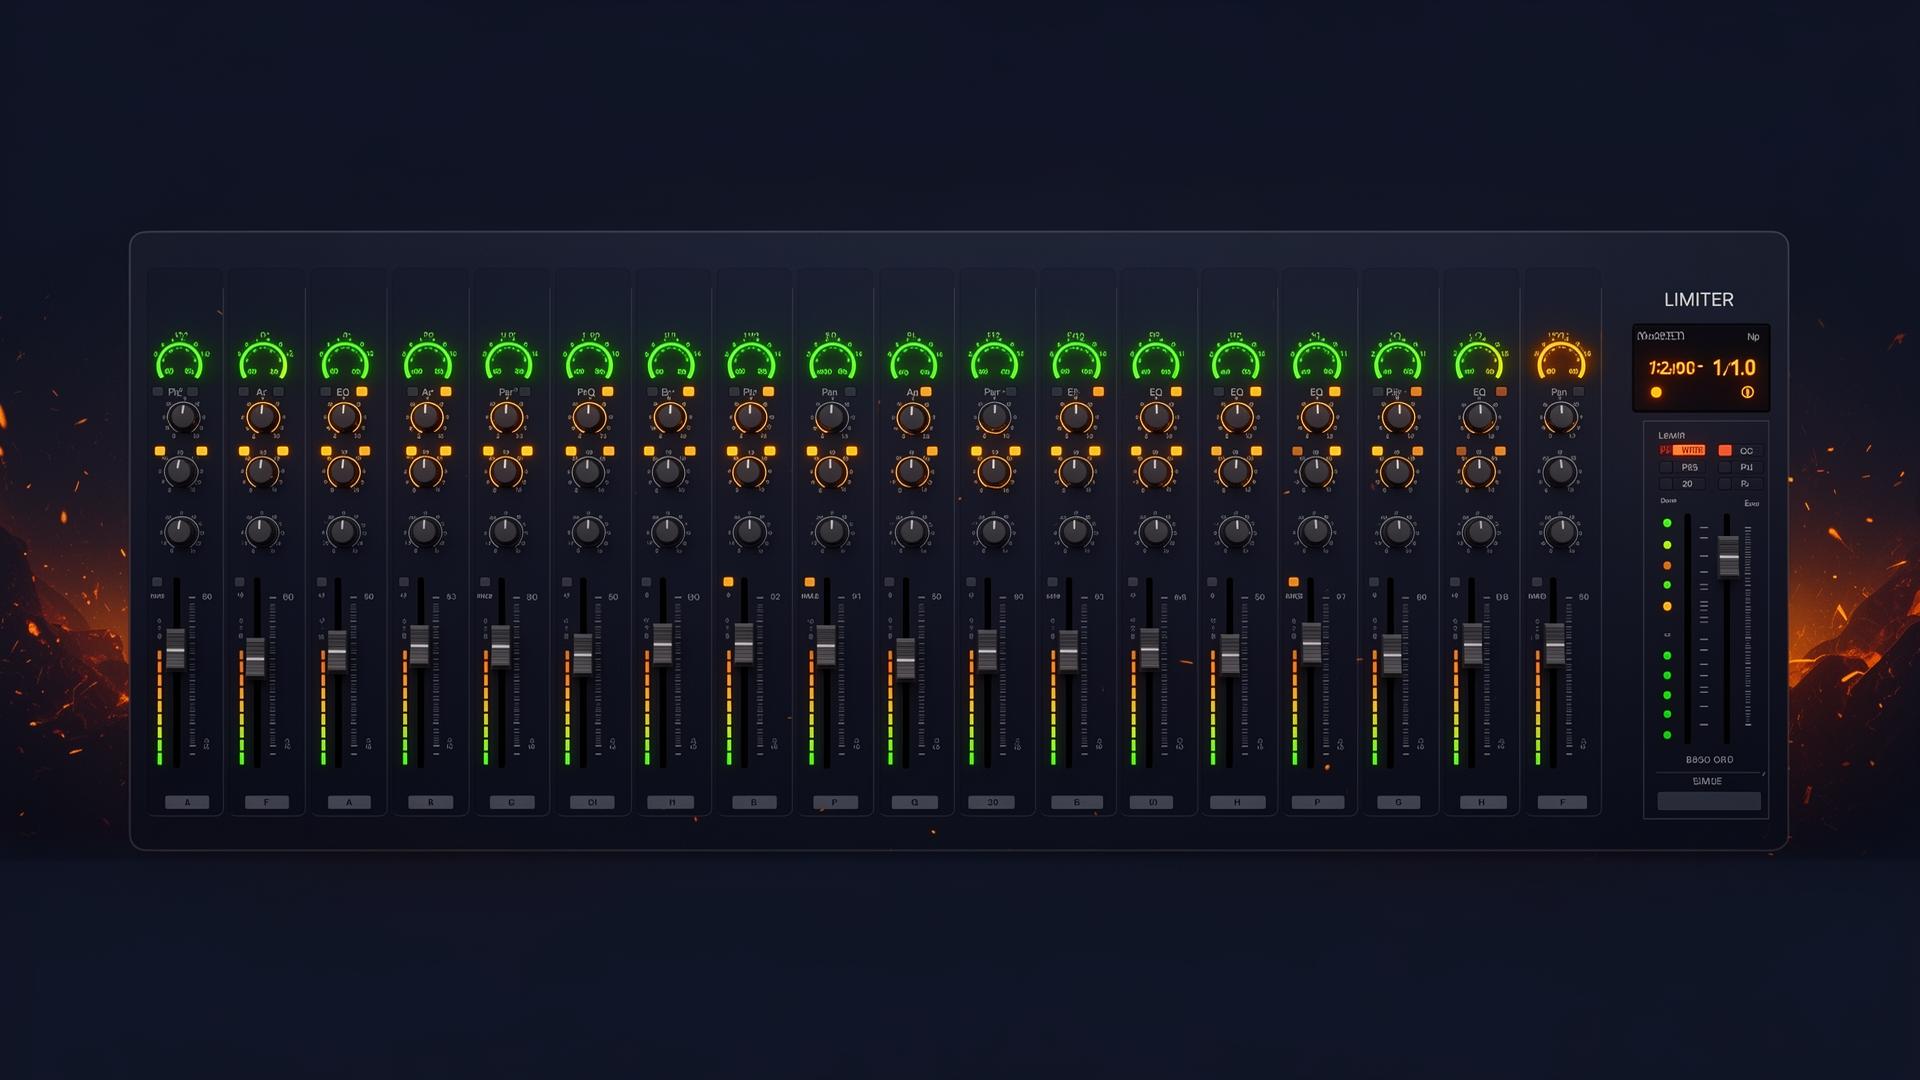
Mixer
The mixer (press 3) is a classic vertical channel strip per track: gain, pan, sends, insert slots, fader, meter. Sends are pre-fader by default; click the small post badge to flip.
Buses & routing
Create a bus from the + Bus button at the right end of the mixer. Route any track to it via the bottom-of-strip output dropdown. Common pattern: a Drums bus, a FX bus with reverb, a Master bus with mastering chain.
Master chain
- Mastering EQ — linear-phase, 8-band, with M/S mode.
- Multiband Compressor — 4 bands, crossover-aware.
- Mid/Side Processor — width, mono-below frequency, stereo enhance.
- Limiter — true-peak with lookahead, ceiling presets for streaming.
Recording & exporting
Hit R on a track to arm it for input. For sequenced material, recording is the act of bouncing a session clip or a timeline region down to audio.
Offline render
File → Export opens the render dialog. Choose format (MP3 on Free, MP3 + WAV on Pro/Studio), bit depth, sample rate, and a loop region. The render runs offline (faster than realtime, no audio dropouts) and downloads when done.
Stems
On Pro/Studio, tick Export stems to get one file per track (or per bus). Useful for mastering hand-offs and remix packs.
Undo, redo, history
Every action — moving a clip, tweaking a knob, deleting a track — goes through the history stack. ⌘/Ctrl+Z undoes,⌘/Ctrl+⇧Z (or Y) redoes. A toast tells you exactly what was undone so you don't lose your place.
The history is per-session — closing the tab clears the undo stack but your project state stays saved.